Monthly Archives: December 2008
Avatar Draw Cost
This isn’t really about fashion, altho maybe it should be. If you’ve ever been in a group of more than about 10 people, you know that things get a little squirrely and after about 30 or 40 folks, things grind rapidly to a halt. There are reasons for that and while most people blame stuff like bling scripts (undoubtedly true), my rather informal observation is that a more important factor is a rather obscure metric known as “avatar draw cost.”
ARC is a measure of how much of a load any given avatar puts on the SL viewer to render it. You can see that measure under the Advanced menu > Rendering > Info Displays > Avatar Draw Cost (Cntl-Alt-Shift-D to turn on Advanced, if it’s not already). When that function is checked, numbers appear above avatar heads to let you know how much effort it takes for that particular avatar to get shown on the screen. The higher the number, the more load that person puts on the viewer. Lower is better. Good numbers are in green, borderline numbers in yellow, and heavy numbers are in red.
Here’s the thing that makes this relate to fashion.
I understand the desire to look good, but when your avi has a draw cost in excess of 5000, you’re using 10x the resources of a person with only 500. What that basically means is that everybody’s viewer (yours included) is having to work as hard as if it were 10 “normal” people instead of just you. Put five or six folks like this in a view and your viewer thinks this is a big crowd. I’m standing in a shop right now — already laggy because of the numbers of textures in my view — and of the dozen or so avi’s here, more than half have numbers in the red (above 1500) and a couple are over 5000 — one of whom is (Away). The rest are in the yellow. I’m the lowest at 315.
What does that mean?
For all intents and purposes, my viewer is having to load the equivalent of .. I’m making a rough count here .. of about 60 “normal” avatars. I’ve been standing there for 15 minutes and all the vendors haven’t loaded. For that matter most of these people standing here are still gray as well. I am able to move about fairly easily, but it seems counter productive to me to build a good looking avi that people can’t see because it never gets a chance to load.
Things to think about.
Draw cost seems to be most effected by flexi, then by complexity of prim attachments. A single prim doesn’t add a lot. A 100-strand flexi tail does. Hair seems to be the worst offender — because almost everybody has it. Some jewelry, especially those items with over 200 tiny prims, appears to add a lot as well, especially when you get close to the individual wearing it.
When I’m putting together a look, I pick the item that gives the most effect and then build around it with the goal of keeping my share of your viewer cost down. My goal is “under 400” and usually I can make it.
Hair: no flexi. I know that flexi generally looks better, but many short hairs and most women’s updos have only a few strands of flexi giving a softer look without contributing thousands to ARC.
Jewelry: simple is better. The highly detailed, scupltural items can add 300-500 points each. That adds up fast.
Clothing: More and more designers are putting in prim/sculpty attachments to their clothing. Sculpty collars, prim cuffs, belts, etc. Most of these don’t add too much, but when you add in a gown with 100 flexi panels in it — or even a jacket with a half dozen flexi bits in the tails — the cost mounts very fast.
When you’re going out shopping, or to an event where you can logically expect a lot of people, pick an item or two that make a big statement and then fill around it with less costly ones. Got a great hair? Terrific! Choose to wear it with a simple diamond stud earring, a tasteful outfit, and some low-draw shoes. Don’t add the 400 prim neck chain with 60 bling scripts, the flashing Oyster watch, and a flexi-tailed tux.
So as we head into the new year and start thinking about resolutions, maybe think about how to make your avi a little less “fat” by paying attention to avatar draw cost. Your viewer will thank you for it.
Free Skin Shootout
Skin is one of the most expensive investments people make, but what makes a “good” skin? There are a lot of crappy skins, some are just freebies re-packaged into vendors. The problem is that “good” depends on a lot of variables, many of which are subjective. In keeping with me “newbie getting adjusted to the grid” theme here, I’ve pulled up some of the readily available freebie skins for men and lined them up for a side by side comparison.
All told, these aren’t terrible. I get the distinct impression that some are actually identical skins that just had a name change and re-emerged. The question to ask is “do they look good enough?” My answer here is, “Maybe.”
I should also note, I’ve left off all the less defined, more cartoon-ish skins. There are some that look really bad, but this group of skins came to the top of the list.
First, we’ll take a look at faces.
We start with two that aren’t free, but I’ll use these as reference points.Abyss has some very good skins at the higher end of the price range. Not exactly photorealistic but still amazingly good when painted on an avatar. You’ll have to make do with the demo because I don’t have enough L$ at the moment to buy one for this post. I don’t mean to imply that this is the *best* but it’s one of the top five male skins, I think. The second, from Defectiva, is my own Conor, Tan, Strap which you’ve seen in other shots.
Men and Hair
Where women have makeup options on their skins, men have hair options. Skins come with various beard and body hair painted on them, usually several of the same options across a variety of skin tones.
Bearded:
The Van Dyke style beard is very popular and these skins (labeled as found) show it in some small variation.
Look closely at Paul and Michael. To my eye, those look like identical skins. The shape of the hair patterns on both the eyebrow and beard looks identical, right down to the small brush strokes and placement of individual hairs.And while we’re on the subject of looking a lot alike, the Million Dollar Skin and Ray Design look pretty similar except for skin tone.
Not Bearded:
The Bellesa skin is a freebie offered at the Bellesa store and actually looks a little better than shows up in the snaps. Matthew is the freebie skin for men from the Platinum store. The Million Dollar Skins are available at the Million Dollar Skin store and comes in a pack of four with various beard options. The others are just skins I found in various freebie lots. Close examination of Empire Tan and Steve makes me think they’re the same skin as well.
Upper Bodies:
“Definition” is the term most applied to body skin. Given the basic structure of an avatar, how a skin maps onto the shape and provides detail in terms of highlight and shadow is what sets a “good” skin apart.
Once again, these are the purchased skins for reference. Notice the way the muscles are indicated with light and shadow and the variations in color and body hair.
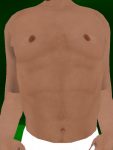
The detail variations here are really interesting. Seeing the torsos lined up, the similarity between Michael and Paul is evident. What’s less obvious (because I got the pose wrong) is the similarity between the Million Dollar (VanDyke) model skin and the Ray Design.
Another interesting detail is revealed in the nipples. Granted it’s not something I’m normally looking at on guys, but there’s some strangeness in these.
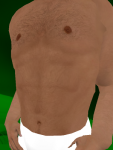
Here’s a close up of Paul’s nipple. Notice the kind of pinwheel asymmetry in the shape that’s repeated on Paul. If you look closely at Steve and Empire Tan, you’ll see the same shape, but capsized.
This is a close up of Samual’s chest. There’s a very prounounced discoloration indicating that the nipple was apparently moved. Comparing this skin to the MD:Goatee and Ray Design, we see a lot of similarities that weren’t obvious on the first blush. Once you know it’s there, the lighter circles jump out of the torso shot on Sam.
Legs and Feet:
The lower torso is often revealed in swimwear and shorts, even for guys. While most guys probably wear long pants, it’s worth paying attention to the variations in leg and feet.
For comparison purposes, once more, here are the Abyss and Defectiva skins:
I didn’t do a good job picking up the foot details on these two shots, but the top of the foot on the Abyss skin is very nicely detailed and the whole leg is depicted very realistically. By comparison, the Defectiva skin is relatively featureless except for some shading around the knees and some very subtle shading on the upper thighs. It actually looks a bit sharper in-world than in these snaps.
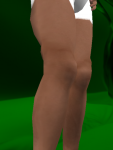
I won’t take up time discussing the similarities so much this time. If you follow the pattern you’ll see that it continues into the lower extremities. One thing I do want to point out is the foot detail in those images where I actually caught the foot. In the MD: Base skin, the foot detail is nicely integrated on the shape. The toes line up with the end of the foot and it looks pretty natural. Compare that to the MD: VanDyke foot and you’ll see that the texture for the foot is slightly out of alignment with the foot itself and that same mistake is repeated on a couple of other skins.
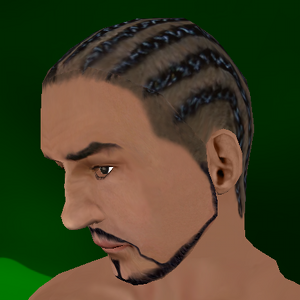
My take away on these was a lot more positive than I thought it would be. Overlooking the possibility that somebody ripped off somebody else with copied skins, the only real flaws in most of them are the nipple-pin wheels. I really do like the Million Dollar Skin: Goatee version .. and as long as I don’t take off my shoes, it’s not a bad look. The real winner in this group is Braids, though, in my opinion. It’s cleanly done, has none of the flaws that I noted in the others, and other than being too “overly muscled” for my taste, would make somebody a good starter skin.
This is the skin without my prim hair on and you can see the detailing on the scalp which gives the skin its name. This hair texture gets in the way of my normal hair, but something with a longer tail in the back would cover it nicely. There is one flaw in this skin, too, but most people won’t notice it. He has two ear canals.Thanks for reading and I’ll see you out on the Grid.
Big Guy No More
I give up.
One of the things I wanted to do here was make a Really Big Guy. Not the muscly warrior type but the Buddha type. I wanted to create an antithesis.
Well, I give up. Working on that last story convinced me that the SL avatar rendering engine just can’t support it and there’s a reason the big guys are all warrior types. What I found was that if I pushed the sliders up too far, the avatar started deforming. The head and face weren’t too bad but there were odd projections sticking out in places that, by rights, shouldn’t be. Pushing out the belly didn’t result in a rounded belly, but something that looked like the end of a log pushing out from my lower abdomen. After about two hours of messing with sliders, what I got was nothing particularly special.
So, if I’m going to write about fashion in SL, and not from the “pretty model” perspective but more from the common guy view, it seems pretty clear that I need to adopt a common guy avatar. Toward that end I’ve rebuilt my shape to be something shorter and smaller with a rather distinctive nose and a body proportioned in the classic “7 1/2 heads” configuration.

Casual Look
Having gotten an initial look, one that’s arguably a bit formal, I decided I wanted a second outfit that I could change into, something for those “kick back and have fun” days. Ideally, I wanted separates that I could mix and match with my tweed suit. With only $300L to spend, I was pretty sure I’d end up with just pants and shirt. WIth those criteria, I headed off in search.
The Task
Get a second – more casual – outfit.
The Budget
$300L for a great shirt and jeans.
The Shirt
There are a lot of shirts — pullovers, layers, prim collars and cuffs. It’s boggling. I wanted something “fun” and a little different, maybe a classic bowling shirt or a Hawaiian.  That reminded me of Ryan’s “Getting Wet” post and I headed over to SHIKI to look for the flower patterns. I found them on the second floor and fell in love with the Hibiscus pattern. Going by the image on the vendor, I figured it for a jacket layer and was very pleasantly surprised to find that it came with a shirt layer as well for $165L. That was more than half my budget but it was so worth it to get a great piece like this.
The Jeans
It seems like everybody does jeans but it’s sometimes hard to tell them apart from the freebie jeans. After about an hour of rummaging through “men’s fashion jeans” in Search (I *hate* waiting for the rez), I went to The Authority and found Blink Pinion’s post on “Jeans: The Right Fit”.  Most of those listed were out of my price range, but the Elephant Outfitter’s “Classic Elephant” jeans looked interesting. They’ve got just the right amount of detail, have a nice distinctive look, and I liked the color choices. With my new hibiscus shirt, they looked really good with the shirt tucked or not. There were two problems, however. The most obvious is price. At $145L, it takes my total to $310L. The second problem was less obvious but showed up when I tried on some of my “freebie filler” items.
 The bare-midriff look might be charming on young ladies, but on men? Not so much. The SHIKI shirt works around this nicely by providing a pair of textured underwear that fills in the missing inches of shirt and matches the jacket layer exactly. Normal shirts, freebie t’s, and the like? Hardly.
So, back on the hunt and I found ZB Men’s Clothing with some really decent looking clothes and their ZB Waterfall Jeans.  These come in a variety of configurations aimed, not doubt, at the “pants down crowd” from the “Young Urban League of Ordinary Gentlemen” but the also have a more traditional “yes, I wear my pants pulled up, thank you” look. The bonus in this pack is that ZB provides two pairs of jeans — a tucked-in look (pictured right) that works with the standard shirt, and an “untucked” look with a lower waistband for the “untucked” look that works very well. At $100L, this pair of jeans was just what I was looking for. While the look may not be quite as detailed as the EO pair, the combination of SHIKI Hibiscus and ZB Waterfall Jeans comes in at $265L, well under my $300L budget.
Of course, the downside is that I bought the Elephant Outfitter jeans because I was willing to go over budget to get such a great looking pair of jeans and so I’m actually $110L over budget for this post. I’ve got some nice jeans, though, and I learned a lot about pants in SL.
The Goods
- SHIRT: Aloha Red Hibiscus from SHIKI Designs
- JEANS: Classic Elephant Jeans – Regular from Elephant Outfitters
- JEANS: ZB Waterfall Blue Jeans from ZB Men’s Clothing
In other news, you may have noted a change in my basic look. There’s a new post coming on that, but I wanted to get this information out before I forgot how it all went down.


